How to be an ace at mobile photography
So you don’t have the cash to get a fancy DSLR camera or the latest flagship smartphone with the world’s best mobile camera. Don’t worry about it. You can still be an ace at mobile photography and take some amazing photos with your current smartphone.
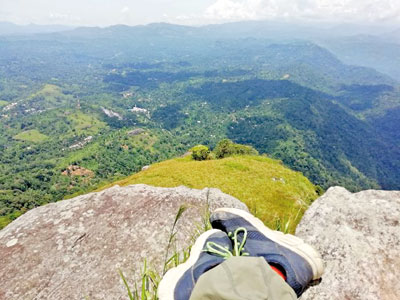
Image Credits: Lahiru Perera
Getting up close and personal for mobile photography
Sure, anyone with a camera can take a photo. But as the saying goes, “the devil is in the detail.” Getting all those intricate little details will make your photo stand out more than if it was a regular photo. This, however, requires a bit of study. You need to get close. The best thing about mobile photography is that unlike a DSLR or regular camera, phone lenses can focus really close.
Closeup and macro photography bring out all the little details in an object.
This allows you to capture detail that you would usually not be able to focus on. Most smartphones have an option to focus on an area of the frame by tapping the area that needs to be focued.
The rule of thirds is another important thing to remember. When you’re focusing on a target, you would usually make sure that they are in the middle grid. But with the rule of thirds, the subject is more towards the right or left of the grid rather than the center. The 3×3 Grid is available in almost all Smartphone cameras.
This, in turn, draws the viewer’s eye into the composition of the entire image itself, rather than just focusing on what’s in the center of the image. Most smartphones will have a setting to enable a grid layout in their camera settings.
Capturing the beauty of nature and landscapes
Taking a step back from shooting close-ups, the next challenge for mobile photography is to capture landscapes. There are a few things to keep in mind when shooting a landscape. Firstly, the exposure. This is the amount of light that reaches your smartphone camera’s sensor when shooting an image. If you allow too much light, then the resulting image would be extremely bright and even distorted. Let in insufficient light and your photo will be dark and unidentifiable.
These are known as overexposed and underexposed shots, respectively. In addition to the exposure, you also have to focus on the clarity or focus point of the scene and also pay attention to highlights and shadows. If your camera has it, you should also look at the camera’s histogram.
Pay attention to your camera’s histogram for mobile photography, it’s important to understand the histogram of your smartphone’s camera. You would essentially want a nice even curve throughout the graph. If at any point, the histogram peaks, that means you’re losing detail in either the highlights or the shadows. These details cannot be recovered later on, so pay very close attention to it.
You should also shoot images in RAW mode. Images shot in RAW are not processed by the image processor of your camera and as such, are just shot as is. This produces higher quality images. Apps such as Adobe Lightroom Mobile can be used to tweak images in RAW format.
Don’t go crazy, though. Set your white balance, and use the color mix options to bring out the blues and greens in your image. But also be aware to keep it in moderation. When in doubt, remember, less is more.
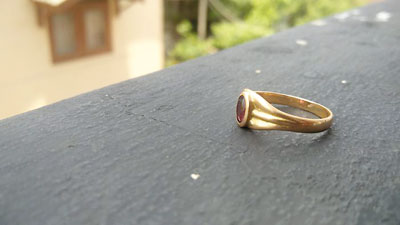
Closeup and macro photography bring out all the little details in an object
Snapping that perfect Instagram #Foodie moment
No point denying it. At some point, we have all whipped out our phones to take a picture of that perfect waffle or cheesecake or to savour that delectable chicken tempura before we go caveman on it. Food photography is actually quite a popular area when it comes to mobile photography. In reality, people actually spend more time taking pictures of their food than actually eating their food.
Generally speaking, carrying out food photography via mobile photography uses a few angles, literally. For example, shooting images of food from overhead, 45 degrees, 90 degrees angles and close-ups are the recommended way to go. For that extra bit of oomph, place the dish in question near sunlight streaming through a window.
You can also try placing the food on a wooden or stone surface and getting some intricate details as well. For example, if you can capture the steam rising from a dish, someone pouring liquid or even a hand armed with cutlery.
Dancing in the dark with lowlight photography
Lowlight photography is similar to landscape photography in certain aspects. For example, you will need to shoot using a tripod to make sure your photos are not blurred. A key element to shooting in low light, especially with mobile photography, is to master the use of the manual mode of your camera. This essentially gives you control over settings such as ISO, and shutter speed.
A general rule of thumb is to keep the ISO low and lower the shutter until you expose the scene properly. A good starting point is to set your shutter speed to around 1/5. The resulting image would have a light trail. If you can manage to go to around 1,” the effects would be further enhanced.
Now because this is mobile photography, it’s very likely that your image will have a certain amount of noise despite you shooting at low ISO levels. But fear not, you can use Adobe Lightroom Mobile to clean it up using tools such as Noise Reduction and Masking options.
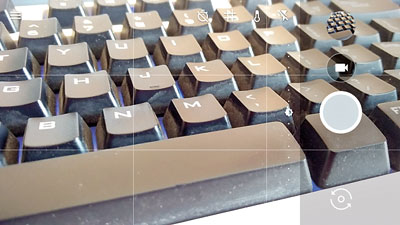
The 3x3 Grid is available in almost all Smartphone cameras
How to take a portrait of someone?
Creativity matters, a lot. The beauty of a good portrait photo is to make the subject the center of attention whilst keeping an eye on your background. Even if the background of the subject is blurred, don’t worry about it. The colors in the background can play a role in how your image is.
Smartphones such as the Google Pixel 2, Huawei Nova 2i and Y9 have actual portrait modes where it adds a bokeh effect, blurring out the background, emphasizing the subject.
And there you have it
Congratulations, you’re now ready to begin your journey in mobile photography. Remember, these are just guidelines to help you take better photos. A greater part of this would be experimenting with different settings and locations, at different times, to find the best place to take a photo.
There is no rulebook to say how and when you can or should take that perfect photo. As the saying goes, beauty is in the eye of the beholder.
A special shout out to two very talented photographers who are Prasanna Welagoda and Ushan Gunasekera who helped out a lot with their insightful tips and advice on how to get the best from a smartphone camera for anyone interested in mobile photography.
The author is senior tech writer for ReadMe a leading tech news provider.
For more information log onto readme.lk
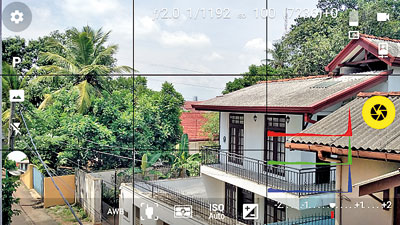
You should pay close attention to your camera’s histogram


An example of a long exposure light trail taken on an iPhone (Image Credits: gadgethacks)


